
Facing brick posts. Brick posts for a fence: a diagram of the device and construction with your own hands
When erecting column structures, sheds, fences, a high load is imposed on the structure itself. For this, during the construction of brick columns, high demands should be made on strength, structural stability and quality. When erecting columns, it is recommended to use only solid bricks without mechanical defects. Halves of bricks can also work, but also without visible damage.

Brick masonry of columns is performed without multi-row strapping, since such a structure does not provide solidity and strength. The strapping is performed when using solid bricks in the structure, if the column in cross section is 2 x 2.
The structure may provide for additional reinforcement using a steel bar or pipe inside the structure.
Column masonry

The erection of a brick column is carried out subject to a certain technology.
It must be observed exactly, since any violation can lead to subsidence of a brick column or destruction of a structure.
For columns, it is performed individually and depends on the purpose of the structure, although its types do not differ in appearance. The brickwork of the columns is made in the form of a three-row garter, since the use of a single-row one causes a lot of labor, and the multi-row one does not differ in strength. For work, it is recommended to use a strong mortar and solid brick. The position of each brick is controlled both vertically and horizontally. To do this, use a level and a plumb line. To provide the mechanical strength and stability of the structure, a reinforced mesh is used, which should not go beyond the masonry.
Column design options:
- supporting structures that take on large loads in the area of \u200b\u200bbearing on the foundation;
- brick fence, accepting loads in the vertical plane. The load can be different, for example, the maximum when adjacent to the gate wickets or minimum when connecting the sections of the fence.
Column making

The column is laid according to the following technology. First of all, consumables are prepared:
- brick;
- cement-sand mortar;
- fittings.
Required tools:
- putty knife;
- plumb line, level;
- container for solution.
A foundation is prepared for the column, into which reinforcement or a metal pillar is installed. A column is erected around the pillar.
The masonry is selected from three possible options: 2 x 1.5 bricks, 2 x 2 bricks, 2 x 2.5 bricks.
The first row is the most responsible, it must be done ideally, because the further course of work will depend on this.
Brick laying 2 x 2 is performed in a specific sequence. The first row is laid out in 3 bricks poke in a butt. The second row is turned 90 degrees horizontally. The third row is laid out like the first, and so on until the end of the work.

The columns are laid sequentially. After laying the first level, the uniformity is controlled with a rope.
When building several adjacent columns, it is recommended to carry out sequential actions. That is, the first rows of all columns are initially laid out, after which the horizon is controlled with a rope and a level. If necessary, alignment is carried out, subsequent control can be carried out when laying out 2-3 rows. Failure to comply with the technology can lead to a violation of symmetry and uneven load on the columns.
To facilitate the work, the following recommendations are offered:
- to create a solid foundation, the first brick is strengthened in the solution in the corner of the future brick column, the second is laid next to a solid fixation;
- at
When it comes to building a fence, or rather, pillars for it, the first thing that comes to mind is a brick. A material that is well-deserved by all home builders. Due to its small size and weight, as well as the ability to create any architectural forms.
Select brick

Making a masonry of a pillar of two types of bricks
The simplest is ordinary ceramic bricks. Can be full-bodied or hollow. In the first case, among the advantages is strength, among the disadvantages is large weight. In the second option, the opposite is true.
Another advantage is cheapness, in a pair it comes with a disadvantage - an unpresentable appearance. Usually, a simple brick is used if the post will subsequently be additionally faced.
Clinker brick. Beautiful, durable, practically does not crumble. Conquers with a variety of textures and the ability of clinker to blend in with buildings made in both classical and modern styles. Of course, it will cost more than its simple clay counterpart.
Silicate brick is very durable, frost-resistant, has excellent sound-absorbing qualities, is environmentally friendly and, of course, not cheap.
So, we weigh the pros and cons and choose one of the options, and then move on.
Building the foundation

In this case, it is required, since the brick pillar will have considerable weight. Anyone who neglects this rule will face big trouble in the future. The soil will surely settle down over time, wash out with rains, and the pillars will collapse very quickly.
Usually, a strip or strip-and-pole foundation (for especially heavy structures) is chosen. The depth of the foundation will depend on several factors: weight and height of the fence, terrain features, soil properties.
Before creating brick supports with your own hands, it will be necessary to put a 2 cm thick cement-based screed on the horizontal surface of the foundation, with the addition of a sealing additive. This is done in order to prevent the absorption of water into the pores of the brick and its subsequent destruction.
When planning work, keep in mind that after the foundation is poured, it is necessary to take a break for at least a week. If you start building the pillars earlier, the foundation may crack, and this will lead to a quick failure of the entire structure.
It is better to wait, and during this time you will find out everything about the concrete solution, which very soon you will have to prepare with your own hands.
Concrete mortar

For working with bricks, you need a simple mortar consisting of sand (4 parts) and cement (1 part). First, a dry mixture is made, sometimes in order to increase the plasticity of the solution, clay and lime are added to it. Then, the mixture is diluted with water until the consistency of thick sour cream.
Technology

And now it's time to do the most interesting thing - do-it-yourself fence posts. Stock up on all the tools you need.
You will need:
- trowel for working with mortar;
- pick - a hammer with a sharpened striker. Useful for hanging or chipping a brick;
- bulgarian. With its help, you can easily cut a brick or make a groove in it;
- plumb line, level, cord - to check the vertical and horizontal masonry.
Brick fence posts can be laid in one and a half or two bricks. In the first case, each next brick must be laid out at an angle to the previous one, so that the width of the post is one and a half bricks, that is, 38 cm.
When laying in the second way, two bricks are laid in a row, connecting with their ends. Then, at right angles to them, one brick is laid. There are two bricks at an angle to it, and finally the last brick is also at an angle. The width of the post will be two bricks or 510 cm.
Do not forget that the bricks are not stacked close to each other: there must be a layer of cement between them, that is, the master has to correctly perform the jointing.
The most popular joint width is 8 mm, it provides sufficient strength of the masonry when minimum consumption solution.
The joining, increasing the strength of the post, also performs a purely aesthetic function. Makes the masonry seams even, and the pillars themselves outwardly more attractive.
Bar masonry

The favorite method of builders is laying under a bar with their own hands, which we will describe in more detail for a pillar of one and a half bricks.
For it, you will need, in addition to the tools described above, steel rods 8 mm thick and 45 cm long - 4 pieces and one rod 10 cm long.
Long rods are installed along the perimeter of the future pillar, and the solution is laid between them so that at the edges it is flush with the rods (that is, 8 mm thick), and near the pillar-support its thickness is about 1.5 cm.
The first brick is laid on the mortar, and with the help of a pick, it is given a horizontal position. Be sure to check the horizontal level with a level!
A short rod is installed near the edge where the end of the second brick will be, mortar is applied flush with it and then it is laid. Next, we continue to the end of the row, after which the rods are removed (pulled out), and the seam is additionally smoothed with a special spatula.
With this method of laying, the seams are smooth, have the same thickness and look aesthetically pleasing, provided that all operations are performed correctly. However, an inexperienced master may have problems, it is better to find out about which in advance.
DIY pitfalls for laying pillars

The main problem that one has to face is the laying of the very first row of bricks, on which the success of the rest of the work depends.
- To get an even row, use a rule, or a cord stretched horizontally 2-3 mm above the level of the masonry.
- The second problem is ensuring horizontal and vertical masonry. So that the pillars do not turn out to be lopsided, each brick is laid strictly according to the level with the obligatory control of their verticality and horizontalness. Do not forget to also check that in each row the bricks lie strictly at right angles to each other.
- The third problem is not the aesthetic appearance of the seam. Possible reason - rods stained with mortar (when laying under a rod). Subsequently, when they are pulled out, the mortar will remain on the bottom of the brick, which looks extremely ugly. It is quite simple to avoid this: it is enough to remove the mortar from the rods before laying the brick by wiping them with a rag.
- Do all the work with your own hands carefully, and you will not have to face problem number 4 - bricks stained with mortar. This is especially important if clinker bricks are used, and the solution contains dyes - it will be extremely difficult to remove ugly stains later. In any case, if such a nuisance has already happened, try to remove the solution immediately, without waiting for it to dry out.
And finally, another fairly common mistake of inexperienced craftsmen is the lack of mortgages for fastening gates, gates, and fence sections. The result of forgetfulness is, albeit a very even and beautiful, but completely smooth post, to which it is not possible to attach anything. How to avoid such a nuisance is below.
Embedded for fastening the intake sections

The type of mortgages depends on what the fence sections will be made of in the future. If it is brickwork, then the role of the mortgages is reduced to connecting the pillars and sections into one whole. Since there will not be a special weight load on them, it is enough to use loops of wire 8 mm thick, laid in every fourth row on the side of the post to which the sections will be attached.
If the sections are made of profiled sheet, wooden beams and so on, that is, they will be attached only to the posts, more durable mortgages are needed that can withstand their weight. In this case, metal plates are used that are welded at a certain height (or mounted in any other way) to the base pillar, and in the brick with the help of a grinder, a cut is made in the right place.
In the future, logs will be welded to the mortgages, and corrugated board, metal rods and other elements will be mounted on them.
All is ready? Do not rush to immediately fix the fence sections - the pillars should stand for about three weeks, otherwise you can easily ruin the whole work. In the meantime, there is time to think.
About tops

Here it is, your first DIY brick pillar! It is perfectly flat, with seams of the same width, made according to all the rules - a feast for the eyes! In order for it to remain so for many years, a final touch is needed - a pommel, which performs several functions at once:
- Protects the brick from excess moisture, which, when frozen, will destroy it.
- Protects concrete and metal base pipes in the middle of the post. If they are not protected, then during the rains the concrete will gradually crumble, and the water, accumulating in the formed depressions, will sooner or later reach the metal base.
- And, finally, the top gives the pillar a more attractive, finished look, being its decoration.
For brick posts, metal caps are usually used, the size of which is selected so that they protrude several centimeters beyond the boundaries of the post. When choosing them, give preference to products without rivets, with well-processed tight joints that can provide reliable protection. In addition, the following requirements are imposed on tops:
- resistance to atmospheric precipitation;
- a sufficient angle of inclination to prevent the accumulation of moisture;
- the ability to securely and accurately attach to the post;
- ventilation to prevent condensation.
And one more piece of advice to anyone who starts laying a brick pillar with their own hands: don't be overconfident! At first, not everything will work out for you, the experience will appear only over time. In the meantime, start with the farthest, most inconspicuous pillar, even if it is not very successful, no one will notice. But, having built it, you will gain skill, and in the future you will not repeat your mistakes.
Owners of country or city private houses sooner or later face the need to fencing their territory. Among the many options for arranging a fence, many choose brickwork as the main material for execution. And there are many reasons for this. If you are thinking about choosing a material for making a fence for a private yard, summer cottage or personal plot, then this publication is for you.

Advantages and disadvantages of building a brick fence
The obvious advantages of using brickwork to create a fence include:
- long service life - a brick fence can easily be inherited not only by your children, but also by your grandchildren, because masonry made of high-quality material is not afraid of climatic manifestations and temperature drops;
- during operation, a brick fence does not require practically any maintenance, if the material is of high quality and new, then no painting or any other surface coatings are needed;
- brick fence has high reliability and strength, it is able to protect the site not only from prying eyes, but also any external manifestations (provided that the fence height is sufficient);
- the ability to independently choose the height of the fence;
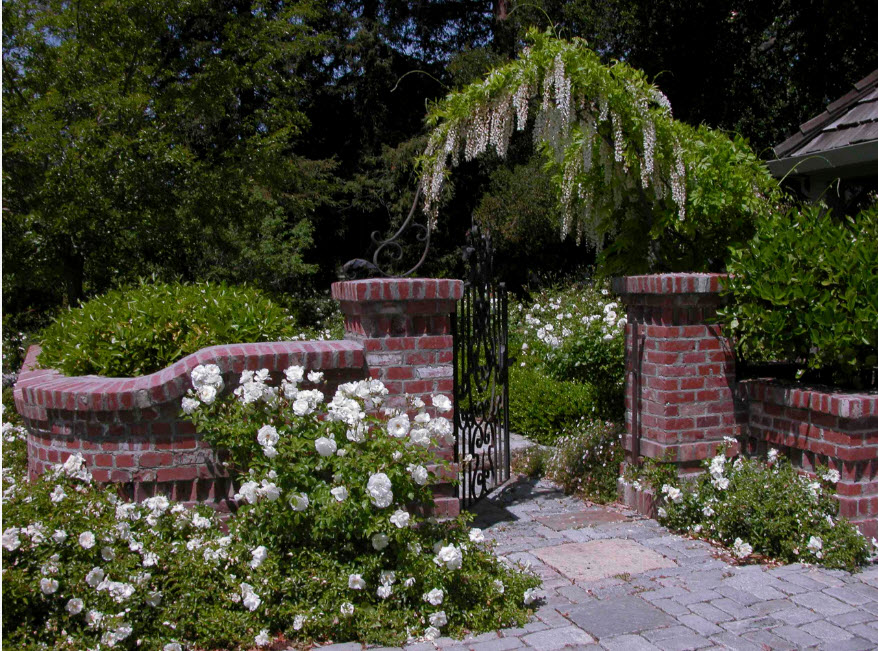
- aesthetic appearance - a brick fence can not only become a reliable fence, but also an adornment of landscape design, a spectacular completion of the image of your architectural ensemble;
- the ability to create a non-trivial design - simple brick canvases can be diversified with decorative inserts, arches, columns (pillars);
- the presence of variations in the execution of a brick fence makes it an almost universal option for any stylistic design of the building facade.


But a medal always has two sides - a brick, and therefore a fence made of this material has disadvantages:
- the rather high cost of both the material itself and the work on its installation (therefore, many owners of private houses with land plots choose the option of combining bricks with other, cheaper materials);
- when using second-hand bricks (in order to save money), the service life of the fence is significantly reduced;
- for the construction of a really strong and durable brick fence, it is necessary to lay the foundation, which increases the term of work and the overall estimate.


Classification of brick fences
Fences, which are brickwork in one or another modification, are subdivided according to the following criteria:
- type of foundation - strip (used most often) or columnar (used only in the case of a small thickness of masonry) foundation;
- the thickness of the brickwork - varies from a size of half a brick to three bricks (it is important to understand that its reliability, strength and durability directly depend on the thickness of the fence);
- the height of the brick fence is a relative value, but usually ranges from 50 cm to 3.5 m (the higher the fence, the greater its thickness should be to ensure the necessary stability);
- the presence of pillars (largely depends on the length of the spans and the views of the site owners about the beauty of the fence);
- the type of material to be combined with (if any).


Let's dwell on possible options combining bricks with other materials. To give the fence more originality, and sometimes to reduce its cost, speed up installation work, you can use combinations with the following materials:
- brick and metal forging;
- wooden picket fence, boards or lattices made of wood;
- metal picket fence or sheet material, metal profile (budget option in combination with brick pillars);
- combination of building bricks with decorative, chipped ("torn");
- in rare cases, you can find a combination of brick and masonry (rather expensive fencing).


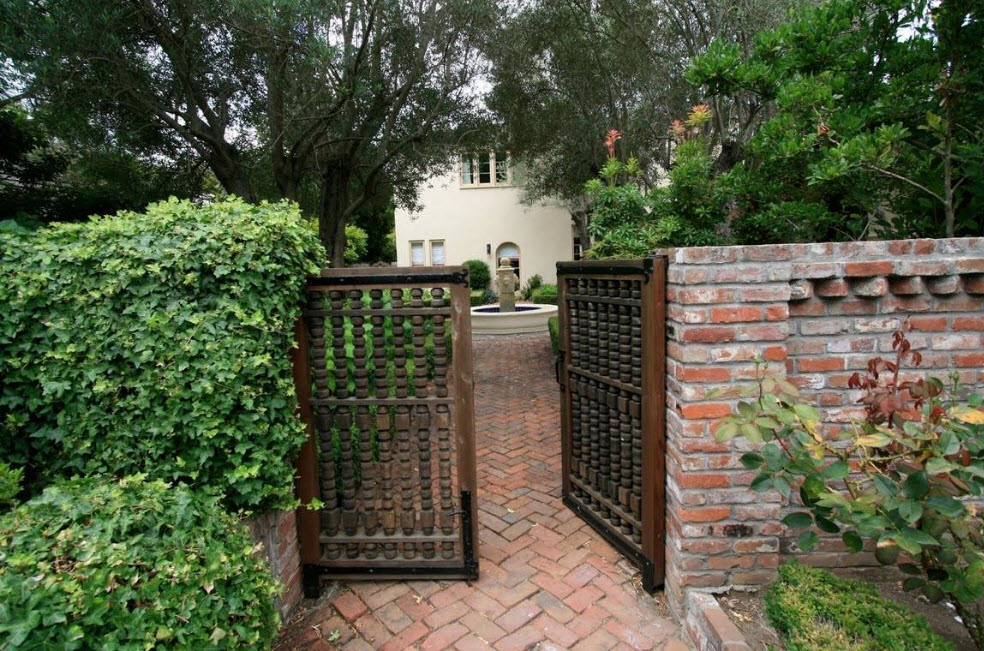
Brick and metal forging
In combination with metal forging, the brick looks luxurious. Forged elements can be used exclusively as a decor for a solid brick wall or be an integral part of it, acting as a material for canvases or intermediate links.


Elements of metal forging can be of different shapes and sizes, located on the fence in different ways, depending on this, three types of brick fence design are distinguished:
Parapet. Forged rods and decorative elements are installed on a solid brick canvas (the height of metal structures is not more than half a meter, as a rule). The fence turns out to be not only beautiful, but also reliable from the point of view of the possibility of outsiders entering the site;


The base is combined with forging elements. The plinth can have a height of 30 to 150 cm; forged metal structures of various modifications are installed on it. Most often, through such a fence, you can see what is happening in the yard or on the site;


Brick pillars plus forged items. The main part of the fence is forging, set on a base no more than 30 cm high, while brick is present only in the composition of pillars or columns. Often, when erecting brick pillars, metal reinforcement is inserted into them (to give the structure greater strength and reliability).


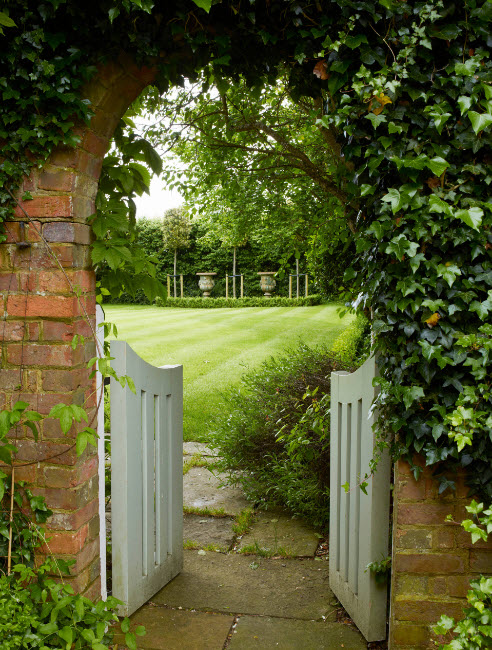
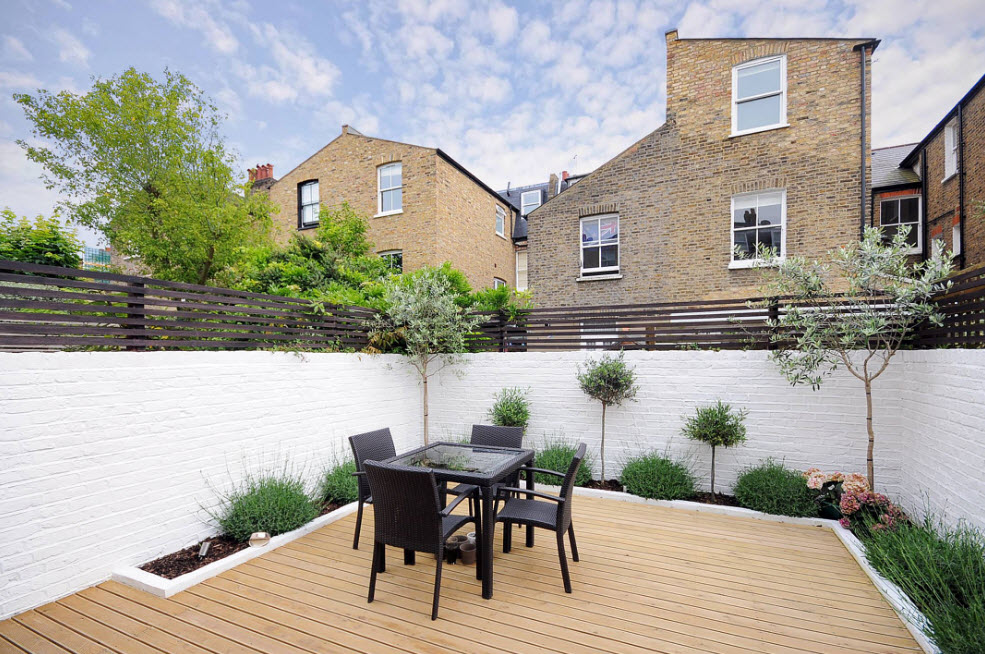
Combination of brick and wood
The combination of brick and wood does not always reduce the overall cost of the fence. Only if you already have wood in stock and you need it, which is called "attach" with benefit. Usually, the combination of brickwork and wood elements is due to the need to create a harmonious image of the entire architectural ensemble with adjoining territory... If wood is used in the facade of the main building, other buildings or elements of landscape design, then it will be logical to use it to create a fence for the site.


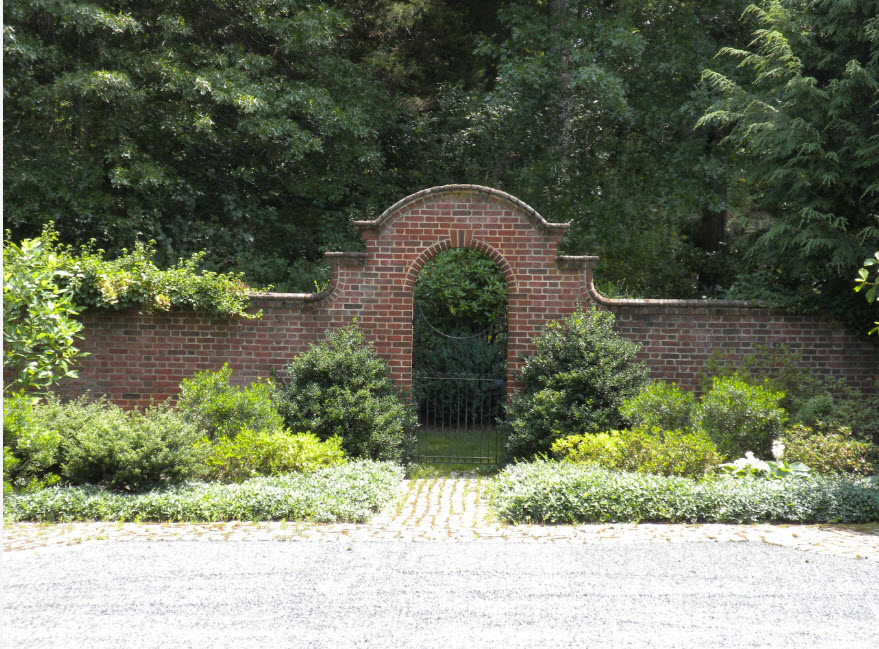
If wooden elements are not often found in the composition of the fence itself, then the use of wood for the manufacture of a gate and even a gate to a brick fence is a very popular phenomenon. Brick largely symbolizes the urban and even industrial style, and beautiful wood carvings or deliberately aged boards seem to soften the image and balance the overall picture.


Choosing a brick color palette for creating a fence
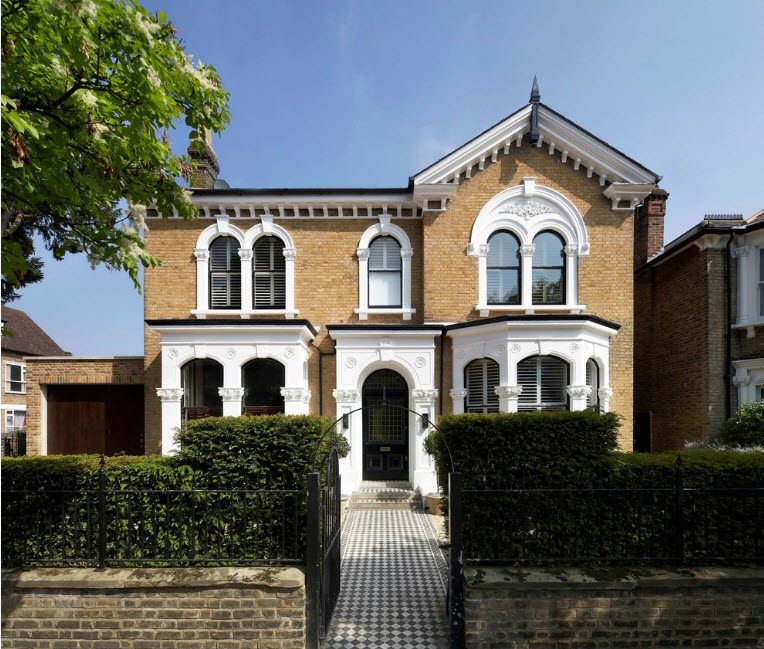
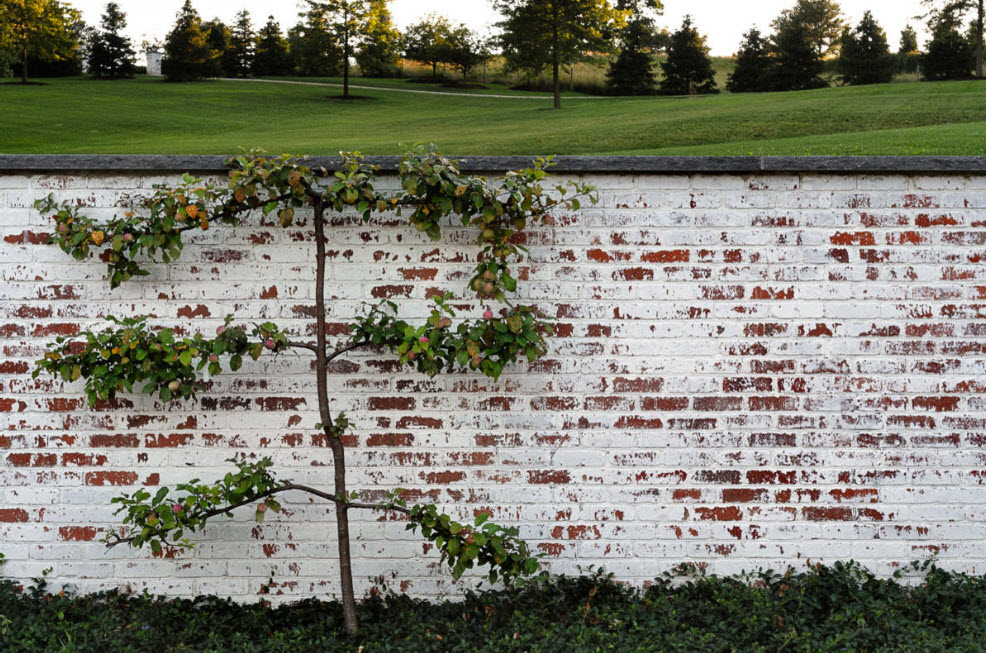
The modern assortment of building materials is striking in its variety. The rich color palette of bricks, especially facade, facing, can become a reason for some confusion for owners of a private home who want to protect their plots. From snow-white and light gray to dark brown and burgundy, brick as a material for creating a fence can both support the overall color scheme and become an accent element in the image of the entire structure and the surrounding area.


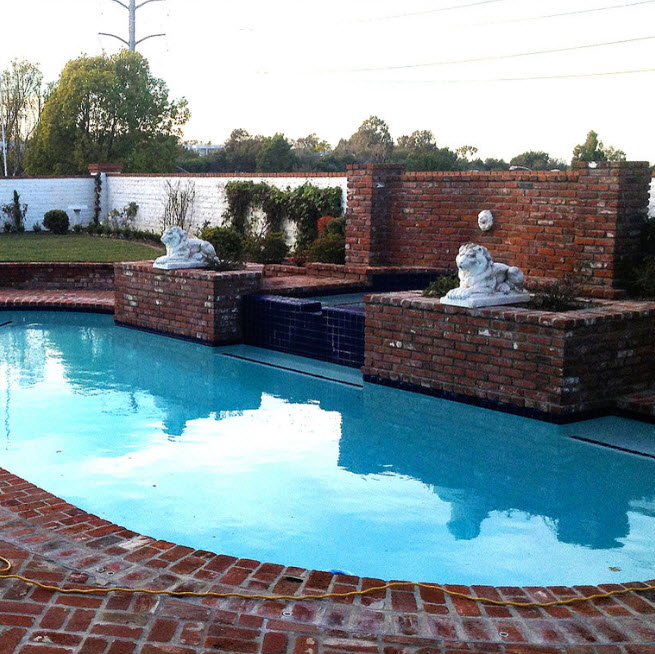
One of the most popular ways to select fencing bricks is by repeating the material used for the façade of the main building. The use of bricks of the same color scheme for the house and the fence leads to the creation of a harmonious image of the whole ensemble. Most often, you can find bricks of almost all shades of red, with a predominance of reddish shades. No wonder the name appeared in red-orange color - it is often called "brick".


Brick of all shades of yellow and orange looks no less impressive, but at the same time more restrained ...


The brick of wine color or shade of marsala looks luxurious. As a rule, a fence with such a color scheme becomes an accent element of the architectural ensemble.


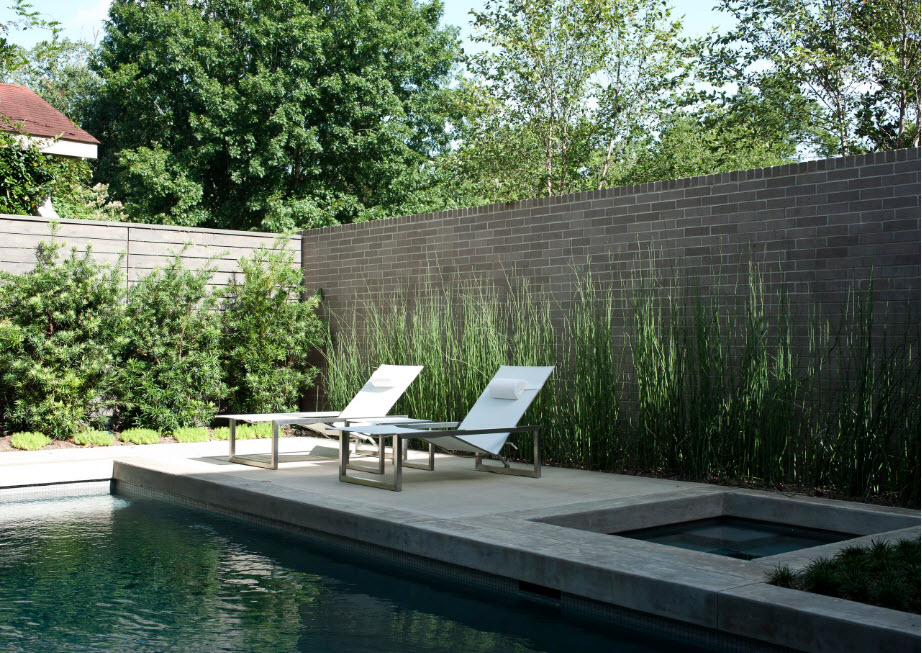
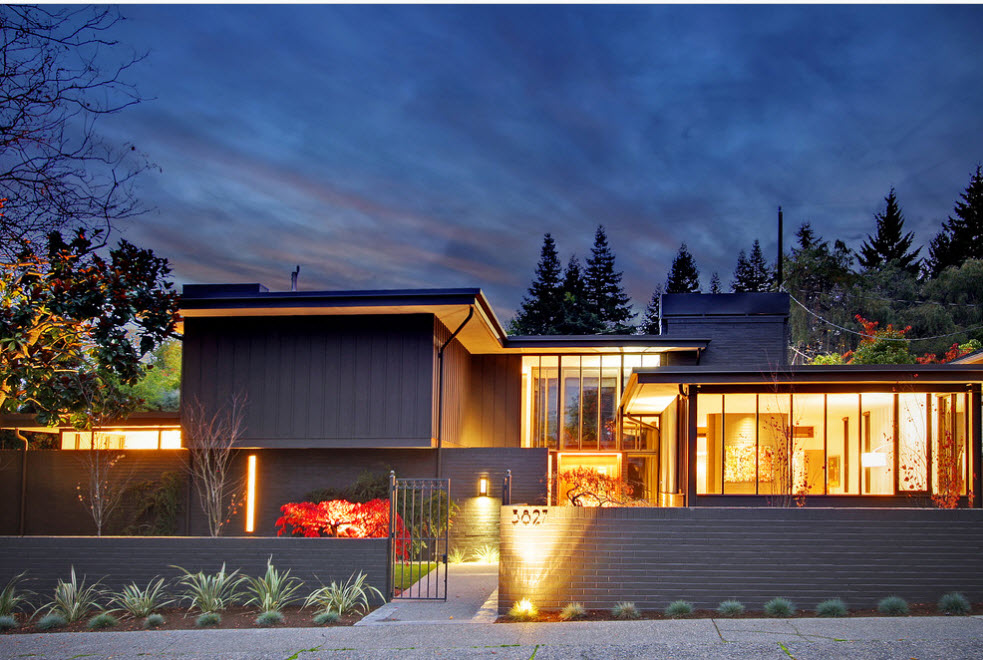
Gray brick is usually chosen if the building and landscape design of the area is made in a modern style and even with an urban bias. If concrete is actively used in the design of a site or yard, then a brick fence of any shade of gray will look more than appropriate.


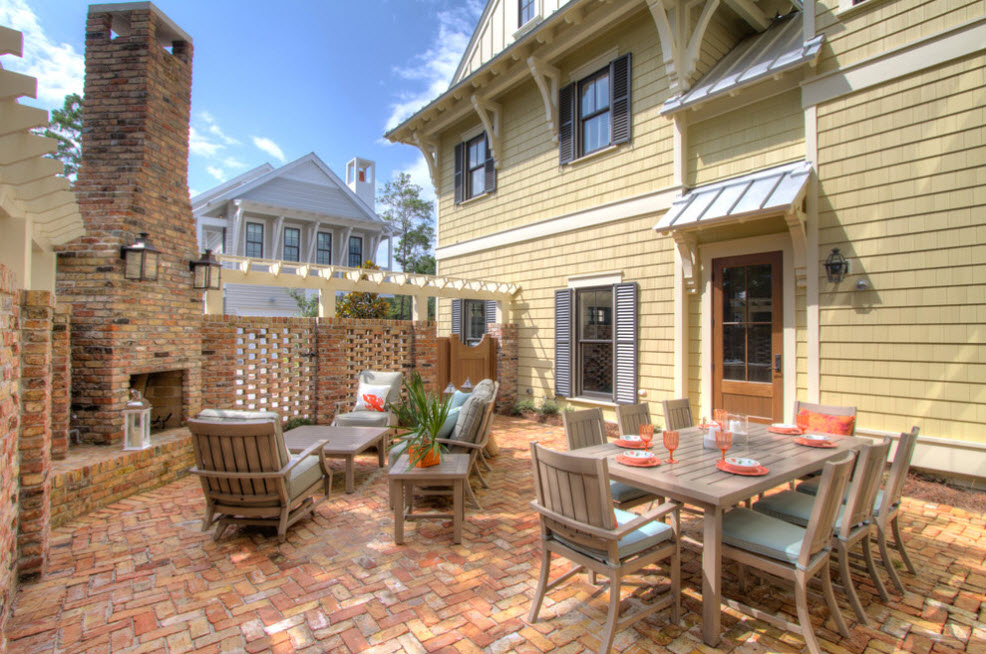
Brick for fencing a private yard or suburban area you can choose the color of garden paths and areas (patios), if they are also made of this building material. In this case, the facade of the main building (house) may differ not only in color, but also in the very material of execution.


Brick, as a building and facing material, does not require subsequent painting or any other coating. Provided that used new material... In the event that used brick is used to extend its intended juice of service, the protective coating will not damage. In some cases, painting is necessary to create a balanced image of the entire ensemble - the household and the area around it.


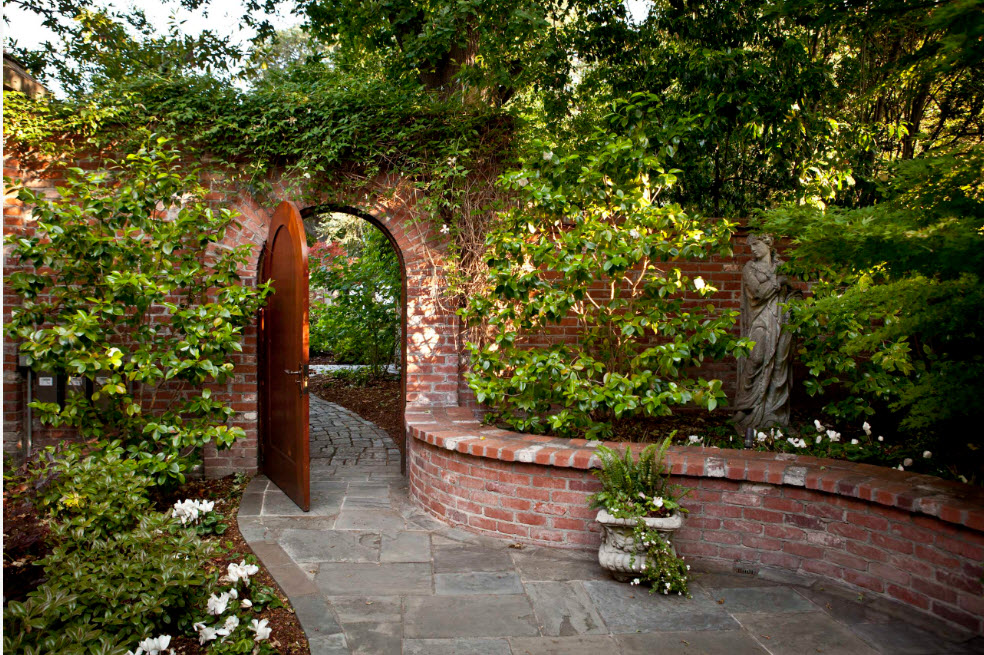
And finally - some original ideas
The fence "with perforation" looks original. The brick is laid out not in a continuous canvas, but in a checkerboard pattern. As a result, the fence has holes through which you can partially see what is happening on the street and in the yard. The fence turns out to be less durable, more decorative, but still capable of protecting the territory from external influences (except for prying eyes).


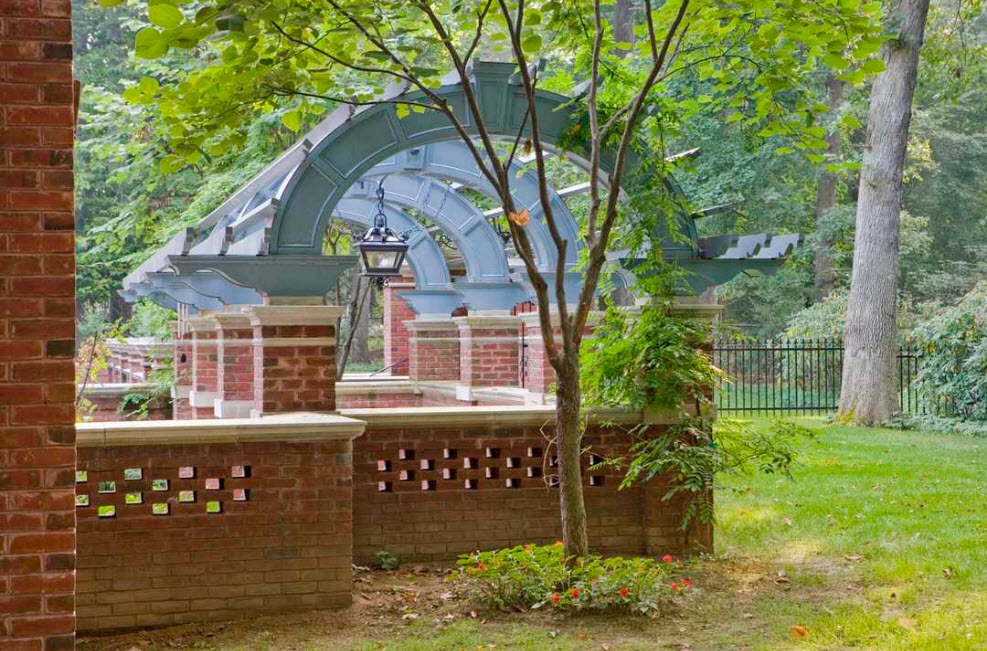
A low brick fence can serve as a garden bed or flower garden. As a result, the plot is decorated with an original element of the landscape, and it is easier for the plants to provide the care that is necessary for each specific crop.

In some cases, the fence has not so much enclosing as a decorative function. As a rule, a low fence is present inside the large-scale areas to enclose the functional segments of the site. Such zoning not only brings order to the clear delineation of the yard or personal plot into sectors, but also decorates the landscape. A low brick fence can serve as a curb - to delimit areas of garden paths and flower beds or beds.


What convinces us the most about construction is, of course, time, this wizard who is used to putting everything in its place.
These brick columns have earned universal recognition and use even in the old "bad" Roman era, and, after all, they still stand and continue to delight us and teach us the work done conscientiously.
Almost according to Griboyedov - "they would study at the elders looking"
Surprisingly, the technology for creating brick columns has not changed at all since then. Yes, new materials have appeared, the range of bricks on the market is simply huge, but the technologies are still the same.

New is definitely a calculation
In the era of the pharaohs, it is believed that even the pyramids were largely built on a whim, simply based on vast experience and intuition. No, there was a calculation and some other - the structures of the Egyptians were strictly aligned to the cardinal points, all thousand-ton stones were fitted to each other to a millimeter, but there was not much rigorous mathematics. What can we say about the columns, but they were built, and what other ones, for centuries.
Calculation for everyone
Calculation of a brick column consists of a number of successive steps.
First, we define the initial data:
- the size,
- brick grade (strength).
Then, in the first step, we calculate the strength of the column, which to some extent depends on the area of \u200b\u200bconstruction. This calculation is performed if the column is not erected by itself, but it will carry a load, in particular a snow one. But winter in Naryan-Mar is one thing and quite another thing in Adler.
Therefore, as additional data, we define:
- roof load (snow) - P;
- the weight of the roof itself is W.
The formula for calculating the load on the column from the roof is as follows:
- Nk \u003d 5 x 8 x (1.25 x P + W) / 4,
where numbers are standard coefficients.
If it is assumed that the column should also carry the terrace, the load on square meter which is averaged in kilograms for Ws, then the formula for calculating the load from the terrace takes the form:
- Nt \u003d 5 x 8 x Ws / 4.
Determine the weight of the column itself:
- Nd \u003d 1500 x 0.38 x 0.38 x D,
where D is the length of the column.
Thus, we calculate the total load on the column in the section near the foundation:
- N \u003d 0.9 x (Nk + Nt + Nd),
where 0.9 is the reduction factor due to the temporal spread of loads in summer and winter.
Useful advice!
This calculation is given for the main column of the entire structure - if there are three, then for the middle one.
Usually, the load on the extreme ones is 2 times less.
Recall also that the grade of the brick indicates the load in kilograms per square centimeter that a brick can withstand.
If M75, then 75 kg per sq. Cm.

An important step in the calculation is determining the strength of the brickwork
It must be borne in mind that the strength of the masonry also depends on the strength of the mortar used.
Thus, having:
- tables SNiP II-22-81 of 1995,
- column section area - S,
- coefficient of working conditions (0.8 is recommended if the cross-sectional area is less than 0.3 m2),
we get the calculated column resistance:
- Nr \u003d 0.8 x T,
where T is tabular data.
Based on the previously obtained value of N, we obtain the maximum compressive stress:
- Nmax \u003d N / (10000 x S).
If Nr turns out to be less than Nmax, then it is necessary:
- use a brick with more strength, or,
- increase the section of the column, or,
- use transverse masonry reinforcement.

To begin with, imagine exactly the layout of the masonry - from the very base of the foundation to the hood
Determination of the stability of a brick column
- N ≤ m x φ x R x F,
where:
- m is the load duration factor. For ordinary columns without load, this factor is 1, although if the load is present, it requires very careful attention and reference to reference books.
- φ - coefficient of longitudinal bending.
This coefficient depends on the flexibility of the column, which in turn depends on its height and is calculated by the formula:
- L \u003d H / h,
where:
- h - real column height,
- H is the reduced height, based on the operating conditions, if the column is not loaded, then H is equal to h and L, thus equal to 1.
- R is a tabular characteristic taking into account the operating conditions;
- F - cross-sectional area in sq. Cm.
If the obtained value is less than N, then the column requires reinforcement.

The nuances of working with the foundation
The foundation is the success of the whole business of building any vertical structure.
The quality of the foundation is especially important for columns, which are characterized by an increased load per unit of foundation area.
- First, it is necessary to determine the nature of the soil... If the soil is inclined to accumulate moisture, the so-called heaving, then the best way out when creating the foundation of the column is to completely extract the soil and replace it with fine gravel or a mixture of gravel and sand.

Whether you use double sand-lime brick M 150 or any other, it must exactly match the design of all buildings in your house. In the photo - we carefully monitor the foundation
- Secondly, to help yourself in building the ideal vertical line of the column, you can concrete a steel pipe into its base. In the future, it will be the core of the entire column.
- Third, pay special attention to the base of the structure.... The base should always be a pyramidal structure of 3-4 "layers".
Each subsequent layer is an approximation to the dimensions of the column itself. The outermost is 20-30% larger than the column dimensions.

- Fourth, lay the mortar very carefully - its thickness should be at least a tenth of the brick thickness. Before using the bricks, it is necessary to soak for some time in water until air bubbles finally exit from them.

- Fifth. By saving the total weight of the column or assuming to use its internal cavity for wiring communications, you can make the column hollow. At the same time, in any case, do not allow moisture to get inside - in the winter season, moisture will simply "tear" the entire structure.
As a conclusion, be sure to carefully concrete the upper surface of the column, make it sloping or, best of all, use a cap on top.

- Sixth, in order to strengthen and level the structure, it is very useful to alternate vertical rows of bricks with solid layers of wood or metal "plates".
conclusions
The nature of the construction of a brick column, its characteristics depend on its purpose - whether it is a part of the fence and, thus, will not bear practically any vertical load, or the column will serve to support a canopy or even an attic (Read also the article). In the second case, there are also significant design and design nuances.

The cost of calculation and construction errors is quite high. Therefore, pay close attention to the calculations. When constructing the structure itself, when it comes to strength, it is better to play it safe and do more than necessary, than to be lazy and not include something in the work.
You can make a reliable and relatively inexpensive fence for the site using a combined fence - the pillars are made of brick, and the filling (spans) and any light material - wood, profiled sheet, forged fences. The view turns out to be solid, and the costs are much less than for a "pure" brick fence. Moreover, the laying of pillars is not the most difficult thing, but it is profitable. Two years ago, the craftsmen asked from 2,000 rubles per pole, and today prices have already more than doubled. You can fold brick posts for a fence with your own hands without the skills of a bricklayer. It is important to follow the technology and everything will work out.
The choice of the type of foundation for brick pillars depends on what material the filling will be from and also on the type of soil. If the span of the fence is made of light material (corrugated board, wood), you can do pile foundation under each post. The depth to which the pile must be driven / twisted depends on the type of soil and the height of the groundwater. If the soil is prone to winter heaving (clay or loam) with high groundwater, it is necessary to bury it 15-20 cm below the depth of soil freezing. On well-drained soils (sands and sandy loams), it is enough to bury 80 cm.
Pile foundation for a brick fence post with easy filling
The pile foundation for a brick pillar is made according to standard technology:
- drill a hole of the required depth (diameter 25-35 cm);
- a bucket or two rubble is poured to the bottom;
- compact;
- a pipe is placed around which they will subsequently lay the pillar (on heaving soils, several pieces of metal rods, tapes, corners are often welded to the buried part for greater stability);
- the pipe is exposed strictly vertically, fixed;
- for heaving soilsif metal pieces have not been welded to the pipe, you can stick several reinforcing bars into the hole; for very difficult soils, you can tie a frame;
- high grade concrete is poured - M300 or higher (read about brands and composition here).
The length of the pipes consists of two values: from the part that is walled up in concrete and the part that will stick out from above. Moreover, the upper section of the pipe does not necessarily have to be up to the very top of the column in this case. It can be 40-50 cm shorter. An exception is the pillars on which the gate and / or wicket will be hung. Here, the inner reinforcement should be almost to the very top.
If the fence is planned to be completely brick or there are large wind loads in the region, most likely you will need to make a full strip foundation... Another option is piles tied with a shallow tape.

Fence construction with brick pillars on a monolithic reinforced concrete foundation
Read more about the types of foundations for different kinds of fences in the article "Foundation for a fence: how not to bury extra money."
Mortar and brick for posts
The mortar is made of cement-sand with a ratio of 1: 5 (or 1: 6). It is better to take sand of a fine fraction, cement of a high grade - not lower than M400. For plasticity, you can add a little liquid hand soap or dish detergent (20-30 grams for a standard batch - 1 bucket).
It is important to obtain the desired fluidity when drawing up a solution. It should not be dry, but it is inconvenient to work with liquid either, therefore water is added gradually, monitoring the consistency of the solution. The desired state can be controlled as follows: spread a certain amount of the solution on some surface, apply a cross on it with a trowel. Then take the marked area onto a trowel and watch the cross: it should not "float".

Optimal consistency of mortar for laying brick pillars
You can, if desired, get a black solution: add soot to it. It is sold in bags at home improvement stores. Add a small amount of soot and you get decorative seams without painting.

Black solution adds decorative effect
Any brick for pillars can be used, just pay attention to the number of defrost-freeze cycles (the more, the better) and geometry. Ideally, the deviations in size should not exceed a couple of millimeters. Then it will be easy for you to work. If the batch is of different sizes, carefully sort by size so that the bricks in one column have a minimum discrepancy.
Fence masonry: technology
In most cases, the posts for the fence are made in 1.5 or 2 bricks, the cross section is 380 * 380 mm and 510 * 510 mm, respectively, the height is up to 3 meters.
The masonry is carried out with a bandage (offset) - the seam of the lower row is overlapped by the "body" of the brick lying on top. The seam is standard - 8-10 mm. The scheme of laying posts in one and a half and two bricks in the photo below.

Brick pillars in 1.5 and 2 bricks
Laying pillars: order of work
Cut-off waterproofing is spread on the finished foundation. It can be roofing material in two layers, but waterproofing on bituminous mastic is better. This layer is necessary so that the brick does not "pull" moisture from the soil. If wet brick freezes, it quickly begins to crack and crumble. Therefore, waterproofing is necessary. Rolled waterproofing can be replaced - twice smear the foundation with bitumen mastic, and in areas with high humidity it is better to make a double waterproofing - smear with mastic, and then lay also "Gidroizol".
According to the dimensions of the pillar, a solution is applied to the waterproofing with a layer of a little more than 1 cm.According to the diagram, bricks are laid on it. They are leveled vertically and horizontally by tapping with a special rubber mallet. Craftsmen can use the handle of the trowel, but, in this case, the remnants of the mortar can fly off the plane of the trowel, staining the hands and brick, and it is badly wiped off the cement.
Ceramic brick absorbs moisture very quickly, so if you hesitate a little, it will be difficult for you to "put" it in place. In order for the solution to retain its plasticity longer, the brick is dipped in water for a few seconds before laying. The same maneuver makes it easier to wipe the solution off the surface (it is removed immediately, with a dry cloth).

Hammer down
The second row is also placed: the mortar is spread on the bricks, bricks are placed on it, but with a dressing - unfolding so that the seam is blocked. Level again. Then they take a tape measure and check the dimensions of the stacked rows. Even a small offset of 1-2 mm is eliminated. They tap on the end of the brick (called "poke"), moving the bricks closer. Then, if the side edges were not coated, the vertical seams are filled. All subsequent rows are laid in the same way.
If there is a void between the inner reinforcement pipe and the brickwork, it is filled. If the distance is short, you can use a masonry mortar, if the void is significant, to save space, you can fill it up with crushed stone, tamp it, then spill it with a liquid cement-sand mortar.
Bar masonry
The laying of the pillars described above has long been tested, but for beginners, when making their own, it is difficult to maintain an even seam. Another problem - the solution crawls out of the seam, staining the surface. It turns out not very nice. To facilitate the work, they came up with a masonry for a bar. Take a square metal bar with a side of 8-10 mm, cut it into pieces, 10-15 cm longer than the size of the post.
Bar layout
Having laid the first row, a bar is laid on it along the edge of the brick. The site is filled with a solution with a small margin, and closer to the pipe, the layer is made larger. Then, driving a trowel along the bar, remove the excess, cleaning the bar from the solution. But at the same time, the slope of the solution remains. They put a brick, level it up. At the same time, the bar does not allow it to settle strongly, and the position of the other end is controlled by the level.
Apply the solution under the bar to the side face
Then they take a short piece of a bar of about 10 cm (for a vertical seam), put it along the butt, apply the mortar with a trowel to the side of the laid brick, also removing the excess along the bar. The second brick is placed and leveled. After the level is set, the seam is pressed from above with a trowel, and the vertical bar is removed.
We take out the bar, holding the seam with a trowel
This is how all the bricks in the row are laid out. Then the rods are taken out, proceed to the next row. This technology of laying brick posts allows you to control the seams and make them neat. Even a novice amateur bricklayer can do this with his own hands. It is only important in the process to control the parameters of each row (so that the column in the section is of the same size).
Video lessons
A more complex version of a brick pillar - twisted with a screw
Features of working with ceramic bricks
Potential problems and solutions
The main problems that can arise when laying posts with your own hands are resizing and "twisting". Both defects are due to insufficient control.
When laying pillars with your own hands, often the upper rows become much wider than the lower ones. This happens gradually, adding a millimeter or even less, but in almost every row. As a result, at a height of 2 m, the column width is 400 mm and even more. This is instead of 380 mm. The fix for this error is to control the size of each row.
It is not enough to control the dimensions of the pillar only with the building level. Mostly, a household instrument (yellow) is used, but it has a rather large error. And if the level is 60-80 cm long, you simply will not see minor vertical deviations. Therefore, they additionally use a tape measure - measuring each row. To reduce the time spent on control, you can make a template according to the size of the post (for example, from flat strips) to check for deviations.
Fence posts are laid around a metal reinforcing pipe, verticality is checked after each row is laid
Self-laying of pillars without experience of such work can lead to another mistake: the edges of the pillar can shift, while the pillar is twisted around its axis. This disadvantage is much more unpleasant: try to attach spans to such posts. There will be many problems. Therefore, when laying each row, it is necessary to strictly ensure that the corners are located strictly one above the other.
You can make the task easier with two corners screwed to opposite corners. They are temporarily attached to the lower rows (with bolts or self-tapping screws into the seam) and then used as a guide, placing the bricks strictly in the corner.
Embedded elements and gate fastening
When laying brick pillars, you need to think about how you will attach the span to them. In order to be able to fix the horizontal guides for filling the fence, mortgages are pre-welded to the pipes located in the middle of the post. These can be corners, pins, "ears" for fastening wooden planks, etc. They are welded at the same height so that the attached crossbars are strictly horizontal.
One of the options is suitable for fixing corrugated board, picket fence
Mortgage options vary. Someone makes from the corner, someone has enough pins. It all depends on the type of filling of the fence (from which the spans will be made) or the mass of the gate leaf.
Options for mortgages in brick pillars
Different weights require different power elements
For gates or wickets, at least three metal parts with a metal thickness of at least 3 mm (preferably 4 mm or even more) are required.
An example of the location of mortgages for swing gates
The device and installation of sliding gates with your own hands are described here. Read about how to automate swing gates here.
Making a cap on a brick pillar
To protect the brick from moisture, the top of the pillar is covered with a cap. They are sold in large quantities, there are metal, concrete or composite. If desired, a cap on a roofing iron post can be made by hand. Below is a diagram. You just have to substitute the dimensions, and then bend it on the bending machine along the outlined lines. They fasten the product with special rivets, but self-tapping screws can also be used. Only you will need to pre-drill the holes, coat them with anti-rust, then paint.
Drawing of a cap on a brick pillar
Photo ideas for fences with brick posts
The most popular option is a corrugated fence with brick posts
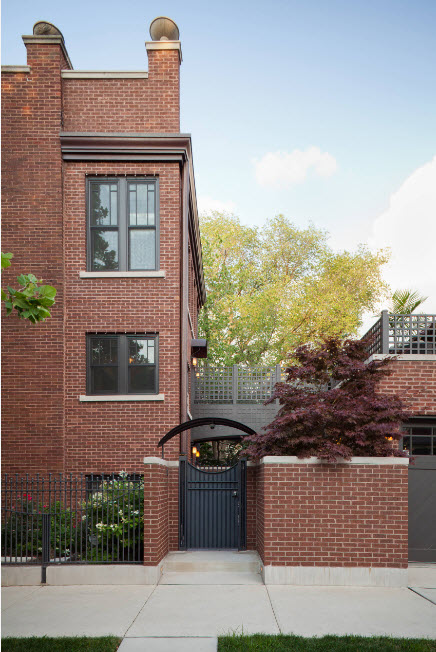
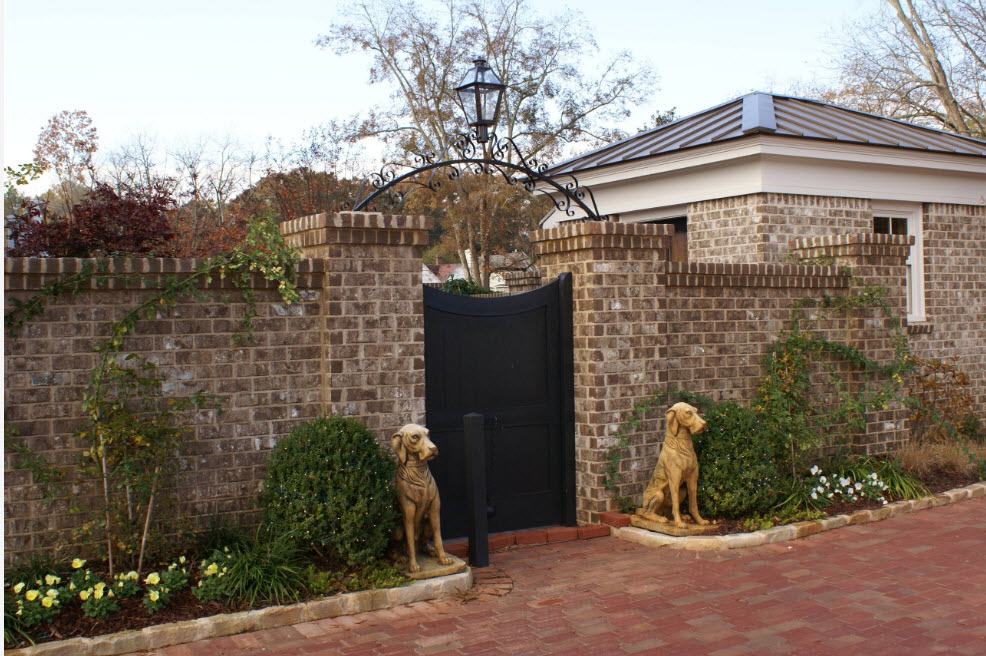
Forging always looks good
Torn stone and picket fence - combined fence
Wood filling can be solid
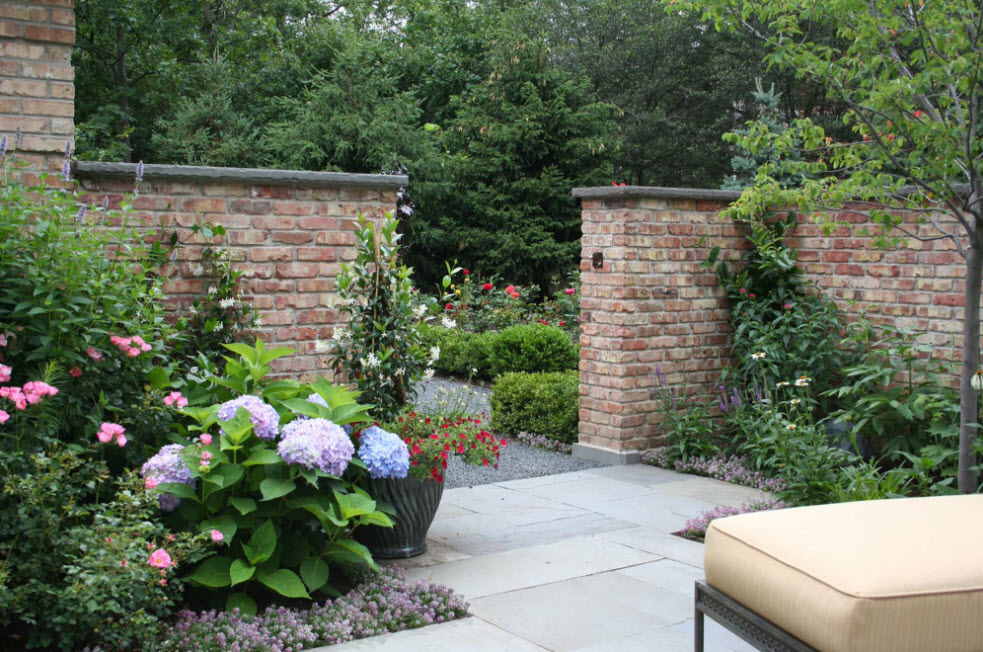
Decorative brick pillars decorate the fence
The most popular burgundy color of corrugated board on the fence
In combination with a Euro-type shtaketnik
Twisted pillars for advanced masons
Humanity has long been using such construction material, like a brick, perhaps as much as he can remember. A brick is called a universal and unified stone, artificially produced for use in construction. Anything can be built from bricks.
Brick is the most versatile and demanded material for construction.
The popularity of bricks continues unabated - to this day it is one of the most demanded materials for construction.
Brick posts are very often used as a support for a gate or fence.
Surely it is impossible to find such a summer resident who, when constructing buildings on his site, when landscaping a house, would not use bricks. Therefore, it will not be superfluous to familiarize yourself with some of the nuances of brickwork. Pillars and piers, lined with bricks, can be elements of building frames inside or outside. In this case, their role is to support the elements located above them. Since the load on them is large enough, the requirements for them are also increased. For example, laying on a multi-row system is prohibited for execution - it is impossible to ensure the solidity of the elements and the required strength. For the same reason, wasted masonry will not work either.
Waste masonry is unsuitable for a multi-row system.
Most often, an element such as a brick post is used as a support for a fence, gate posts, wickets, as part of a fence. In this case, the material of the fence itself can be anything. It can be pillars from silicate bricks, as well as from any others - at the request of the owner. Laying brick posts should certainly be a bricklayer who has experience in such work. Pillars of brick, simple or facing, are laid out in rectangular or square shape.
Mortar for masonry
Method for preparing mortar for brickwork: a dry mixture of cement and sand is sealed with water.
For laying out brick pillars, a simple sand-cement mortar is used - the ratio of cement and sand is 1: 4-6. Its main purpose is to prevent one brick from moving relative to another. When laying, it will experience a load of displacement, compression, but not breaking. For this reason, an overly thick solution should not be made. For greater plasticity, sometimes a part of clay or lime is added to it. Thanks to this additive, the fluidity of the solution increases. We lay down the mixture carefully, trying not to put too much. Lime can be replaced with liquid soap or washing powder, but such a composition should not be used if a hollow brick is chosen for masonry - too much mortar is flowing into the cracks of the brick, due to which the thermal insulation properties deteriorate significantly.
It makes no sense to make a lot of solution, as it will be consumed in small portions.
A mortar for masonry is prepared, as a rule, in this way: a dry mixture is made of cement and sand, which is mixed with water. The solution will be consumed in small portions, so it makes no sense to immediately prepare it in a larger volume than 20-50 liters. Experienced builders do this: they take a small amount of dry mixture and mix it with water, and after using it, prepare the next batch. But with a large upcoming volume of masonry, which is also performed by several people, a concrete mixer can also be used to prepare the solution.
Basic tools:
- trowel - with its help the solution will be applied or its excess is selected, which squeezed out when the brick was adjusted. In this case, the brick being laid itself is adjusted by the back of the handle;
- pick - a hammer with a sharpened firing pin. It is used for chipping or hanging bricks;
- bulgarian - her in recent times began to be used more and more often. Using a stone disc, you can cut or cut a brick much more accurately;
- plumb line;
- building level;
- cords and other auxiliary tools, if necessary.
Problems that arise during masonry
The main problems with masonry are laying the bricks on the same level and in a straight line and drawing vertical right angles.
Basically, novice bricklayers have the following problems when laying posts: laying bricks on the same level and in a straight line, as well as removing vertical right angles. When laying bricks, the main thing is the correct laying of the first row. In order to get a straight row, laying is done using a long rule, a stretched cord or an even rail. At the same time, the brick should not reach 2-3 mm to the guide, so that the solution cannot press on it. To ensure horizontal masonry, each of the bricks must be checked using a level. The bricks are also checked in pairs with neighboring ones. If the masonry is front, this will be especially important for her.
Preliminary work with the foundation
The foundation pits for brick pillars should be 1 m deep and of sufficient width.
Brick posts should not be erected without a foundation. Their weight is quite significant, and the soil will not be able to withstand it for a long time - it will definitely start to wash out, settle, the support will quickly collapse. But a properly prepared foundation will help the pillars to stand calmly for more than a decade. To begin with, dig holes 1 m deep and with sufficient width. The lower part of the foundation should be made wider than the upper one - this will help to make the structure more stable. Particular attention should be paid to the pillars near the openings - this is where the greatest loads are. A layer of rubble or stones is poured onto the bottom of the pit, a metal pipe is installed, aligned vertically and poured with concrete. The foundation is left to stand - it will take at least a week, and preferably a month. If the foundation has not stood enough, during the laying of the masonry, it may crack, which will subsequently lead to premature destruction of the structure.
Laying out brick posts
Brick pillars are a column that is free-standing or standing on a base such as a strip foundation.
A brick post is a free-standing or standing column such as a strip foundation. Finishing material, that is, facing, anything can be chosen: from natural or artificial stone to tiles. But in most cases, the columns are built simply from facing bricks, choosing the most suitable texture and color scheme for the design of the fence. A brick column is laid out around the supporting base. Usually it is a steel pipe with a square or rectangular cross-section or a channel. Metal structures are treated with anti-corrosion protective agent and painted with enamel. Bricks should be laid around this base, checking the correctness of the masonry using a level and a plumb line.
Brickwork for posts is usually one and a half bricks thick. The material, as a rule, is chosen hollow, made as a facing or, as it is also called, facing. Such posts have an excellent presentable appearance, do not need plastering and are practical enough for use. The mortar with which the pillars of facing material are placed should only be of high strength grade.
There are quite a few types of brickwork. Together with the jointing method, you can get different textures in order to emphasize the greatness and splendor of structures with these elements and turn brick columns into a wonderful architectural creation.
For the construction of fences, posts should be placed at intervals of no more than 3 meters. If necessary, structural elements are attached to the pillars - for this, metal T-shaped parts must be laid in the pillars' masonry at the calculated distance. But the most reliable and correct way to attach the log to the posts is considered to be welding the log through a certain number of rows of brickwork. Where the lags should go inside the posts, the brick is cut using a diamond disc. The first mortgage is embedded at a height of 15 cm from the base level. Next, the brick is laid to the desired height, after which the middle of the side to which the fence will be attached is determined. At this point on the brick, you need to make a pencil mark and use a grinder to cut a groove to the full width of the brick. Only a third of the width of the brick is sawn. After that, the insert plate is inserted into the groove so that only a small part protrudes outward, and in the inner cavity of the column the plate would reach the pipe.
The next row - one of the bricks is cut in the same way and covers the mortgage. The second is done exactly in the middle of the pillar, the top one is placed 15 cm lower than the top row of bricks. Sawing must be done carefully, in exact accordance with the dimensions, so that the mortgages can fit into the grooves as tightly as possible.
When squeezing out excess mortar, it must be immediately removed with a trowel before it has time to dry. The upper part of the masonry is covered with a special cap to protect the concrete from washing out. Now the brick post is almost ready. The last thing to do is to process the masonry seams.
A few tips for performing masonry:
A three-row brick laying system is used for walls with a width of up to 1 meter.
- Each brick laid in place is certainly checked vertically and horizontally - this is done using a level and a plumb line. The reinforcement mesh should cover all bricks, but should not go beyond the masonry.
- If walls are adjacent to the pillars, they must be connected using a bolt released from the pillar or steel rods laid inside. - the laying is carried out in half a brick because it does not carry any load, except for its own weight. The only requirement that is presented to her is external attractiveness.
- Piers with a width of up to 1 meter should be laid out according to a three-row binding system, and with a width of more than 4 bricks, they can be laid out according to a multi-row system. With a three-row system, in order for quarters to form in the walls, quarters must be laid in the first of the butt rows, and halves in the spoon rows.
Brickwork joining
The jointing is needed so that the masonry seams look smoother, and the posts themselves are neat.
The posts should look attractive and neat, and for this it is necessary that the masonry joints look as even as possible. The jointing helps a lot for this. Before starting work, sweep away the dried residues of the solution with a wire brush or a simple broom, rinse with water, after which you can start joining. The solution is mixed so, one part of lime and cement for ten parts of sand. After mixing, the solution should be used as soon as possible, literally within a couple of hours, until it has hardened. Before applying the jointing solution, the surface of the posts should be thoroughly wetted. The most common seam treatments are:
- wasteland;
- under plaster;
- processing of seams along with masonry;
- processing for joining.
The first method - the solution does not completely fill the space between the bricks; 1-1.5 cm remains on the front side.However, it is used much less often than others - this type of finish, such as plastering, is rarely used for pillars. Basically, the cladding is carried out using decorative finishing stone, tiles and other similar materials.
The second method - the application of the solution is carried out flush with the masonry, and in case of excess, they must be trimmed with a trowel. Thus, the surface is flat and the appearance is neat. For the third method, you will need a special tool, that is, jointing. The sharp edge of this tool is used to cut off excess mortar, and the concave or convex end helps to shape the seams. Thanks to such jointing, not only the decorative properties of the masonry increase, but the seams are also more compacted. The solution should not just be applied, but rub into the seams with some effort - this way it better combines with the solution in the masonry.
First you need to process the vertical seams, then those that are horizontal. After such a procedure as joining, the posts must stand for at least three weeks, and only after that the installation of the fence can be started. If it is decided to carry out such work as laying columns on your own, and the experience is small, you should not despair. Careful attention to all stages of the process will help the most here. It is better to start laying the pillars from the farthest. If the first does not work out very well, gradually the laying will look more and more neat.
As you know, the job of a bricklayer, to put it mildly, is not the easiest one. There are many subtleties and a huge number of techniques for obtaining high-quality masonry. Let's figure out how many rows of bricks can be laid per day, without compromising the quality of the future wall.
Experienced bricklayers do not recommend laying more than 4 rows per day (12 hours) depending on the fluidity of the solution and the ambient temperature. This is due to the fact that each subsequent row will press on the mortar that has not seized, reducing the masonry seam, squeezing the mortar out of it. However, please note that this applies to the usual brick format (1nf), when using a one-and-a-half brick, no more than 3 rows of masonry are allowed, and when using a double brick (2.1nf), no more than 2 rows are allowed per working day.
It should also be understood that with a decrease in the ambient temperature, the setting time of the solution increases, and therefore, at an average daily temperature of less than 8-10 degrees, it is preferable to reduce the volume of the masonry by half.
- The Central Bank told about the new tariffs for the civil liability insurance What's new for the civil liability insurance from June 1
- What is sleep and who uses it What does sleep mean income
- Debit cards "Sberbank of Russia": what does this concept mean, how to use, an overview of the offered by the bank
- Simplified taxation system What does it mean in accounting usn